Thursday, July 30, 2009

Spellcast Lesson 3, Dressing for the Occasion


When it comes to standing toe to toe with a monster, melee jobs may have a lot of setups in how they engage their enemy. Are they tanking? Soloing with an evasion setup? Or straight up bringing the pain?

This is where variables can play a part. So far, you're almost a master at setting up gear sets. You've dabbled in some rules. And now it's time to get wet in a hot tub of variables.

Let's use ninja for this example. There's a lot of gear sets a ninja can utilize. Elemental wheel, haste, accuracy, damage dealer, evasion, tanking, enmity, etc. But let's focus on when you're engaged to the enemy. You may be tanking exp/merit mobs, fighting/soloing an NM with an evasion setup or acting as a damage dealer where haste and/or accuracy is key.

Rather than manually changing to a particular gear set when you engage an enemy, we can use variables to predefine which set to use. Let's look at the xml file below.

<?xml version="1.0"?>
<!DOCTYPE spellcast PUBLIC "spellcast" "spellcast.dtd">
<spellcast>
  <config debug="false" requireversion="2.17"/>
  <sets>
    <group name="Ninja|NIN" default="yes">

        <!-- Idle gear, Not Engaged, Not Casting -->
        <set name="idle">
          <head>Goblin coif</head>
          <body>Haubergeon</body>
          <hands>Enkidu's mittens</hands>
          <back>Amemet Mantle +1</back>
          <waist>Warwolf Belt</waist>
          <legs>Byakko's Haidate</legs>
          <feet>Ninja Kyahan</feet>
        </set>

        <!-- Melee Base Set -->
        <set name="melee">
          <head>Walahra turban</head>
          <neck>Spectacles</neck>
          <lear>Suppanomimi</lear>
          <rear>Minuet earring</rear>
          <body>Ninja chainmail</body>
          <hands>Enkidu's Mittens</hands>
          <lring>Blood ring</lring>
          <rring>Rajas ring</rring>
          <back>Amemet Mantle +1</back>
          <waist>Life Belt</waist>
          <legs>Byakko's Haidate</legs>
          <feet>Nobushi Kyahan</feet>
        </set>

        <!-- Accuracy Melee Gear -->
        <set name="acc" baseset="melee">
          <head>Optical Hat</head>
          <body>Haubergeon</body>
        </set>

        <!-- Evasion Melee Gear -->
        <set name="evasion" baseset="melee">
          <head>Optical Hat</head>
          <neck>Evasion torque</neck>
          <lear>Dodge earring</lear>
          <rear>Dodge earring</rear>
          <body>Scorpion harness</body>
          <hands>Rasetsu tekko</hands>
          <feet>Arhat's sune-ate +1</feet>
        </set>

        <!-- Haste Melee Gear -->
        <set name="haste" baseset="melee">
          <hands>Dusk gloves</hands>
          <feet>Fuma sune-ate</feet>
        </set>

        <!-- Enmity Melee Gear -->
        <set name="hate" baseset="melee">
          <lear>Eris' earring</lear>
          <rear>Eris' earring</rear>
          <body>Arhat's gi</body>
          <hands>Yasha tekko</hands>
          <waist>Warwolf Belt</waist>
          <feet>Arhat's Sune-ate +1</feet>
        </set>

    </group>
  </sets>

  <variables>
    <!-- Engaged Melee Gear -->
    <var name="meleeset">melee</var>
  </variables>

  <rules>
    <!-- Autoset and Gear Changes -->
    <action when="idle"    type="equip" set="idle"/>
    <action when="engaged" type="equip" set="$meleeset"/>
  </rules>

</spellcast>


You will see all the gear sets set up as usual. However, take a look at the rules section. See "$meleeset" that is used for the rule on engaging an enemy? There isn't actually a gear set called "$meleeset". That is a variable! Now look in the variables section. This is where you declare and set up the default value of your variable(s). You will see that "melee" is the current value of the variable. This means that each time you engage a target, it will use the "melee" gear set.

With the nature of variables, this value can be changed at anytime. If you change the variable to "hate", you will now change into your enmity set up each time you engage an enemy. You can do this by setting up a macro or manually typing out the following: /sc var set meleeset hate

To change it to your evasion set up:
/sc var set meleeset evasion

To change it to your accuracy set up:
/sc var set meleeset acc

You get the idea now. This is just a basic use of variables and will hopefully give you an idea of how to build on it for use with more advanced rules and situations.

Wednesday, July 29, 2009

Spellcast Lesson Deux, Le Dressing Room Intermediate

I hope you have the basics down of gearsets and how to apply them to your statuses of being idle, engaged and healing.

But now you ask, "What about when I wanna do some actual useful stuff? Do I have to set up an entire new gear set for all 12-16 slots every single time?!" Nope! That's where the use of base sets come in. Think of it as layering a set of armor over another set of gear.


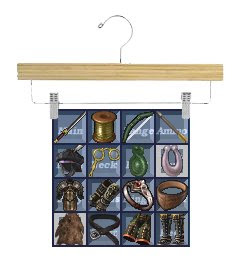
So let's get back to creating updating some XML! Okay, I know the above pic has Corsair gear shown, but I changed my mind for my following example. Suppose you played Samurai...

Take note of the gearsets "melee" and "ws". "Melee" has all 12 armor slots filled. "WS" only has 8 declared. However, "WS" is using "melee" as what is called a base set. In a way, Spellcast will know to use first equip the "melee" set and then equip gears noted in the "WS" accordingly.

<?xml version="1.0"?>
<!DOCTYPE spellcast PUBLIC "spellcast" "spellcast.dtd">
<spellcast>
<config debug="false"/>
  <sets>
    <group name="Samurai|SAM" default="yes">
      <set name="idle">
        <head>No.3's Garland</head>
        <body>Kirin's Osode</body>
        <hands>Ochiudo's Kote</hands>
        <legs>Byakko's haidate</legs>
        <feet>Nobushi Kyahan</feet>
      </set>
      <set name="Melee">
        <head>Walahra Turban</head>
        <neck>Spectacles</neck>
        <lear>Fowling earring</lear>
        <rear>Merman's Earring</rear>
        <body>Haubergeon</body>
        <hands>Hachiman kote</hands>
        <lring>Blood Ring</lring>
        <rring>Rajas Ring</rring>
        <back>Amemet Mantle +1</back>
        <waist>Life belt</waist>
        <legs>Byakko's Haidate</legs>
        <feet>Nobushi Kyahan</feet>
      </set>
      <set name="WS" baseset="Melee">
        <head>Wyvern helm</head>
        <neck>Chivalrous chain</neck>
        <body>Kirin's Osode</body>
        <hands>Pallas's bracelets</hands>
        <lring>Flame Ring</lring>
        <waist>Warwolf belt</waist>
        <legs>Shura Haidate</legs>
        <feet>Creek F Clomps</feet>
      </set>
      <set name="WSmulti" baseset="WS">
        <hands>Enkidu's Mittens</hands>
      </set>
    </group>
  <sets>
  <rules>
    <action when="Idle"    type="equip" set="idle"/>
    <action when="Engaged" type="equip" set="melee"/>

    <if type="WeaponSkill" spell="Tachi:*">
      <action type="equip" when="PreCast" set="WS">
      <action type="equip" when="AfterCast" set="melee">
    </if>

    <if type="WeaponSkill" spell="Penta Thrust">
      <action type="equip" when="PreCast" set="WSmulti">
      <action type="equip" when="AfterCast" set="melee">
    </if>

  </rules>
</spellcast>


As for the rules section, it will equip the "WS" set before you perform any weaponskill that starts with "Tachi:". After you perform a tachi weaponskill, it will then equip your "melee" set.

And before you ask, the answer is yes. You can create a set that uses another gear set as a base set that's using another gear set that's using a base set. Take note of the gearset "WSmulti". It's using "WS" as a base set which is then using "melee" as its base set. Think of it like that one douchebag that likes to wear 3 polo shirts with all popped collars. Make sense? Okay, maybe not.

Setting up weaponskills (and spells) with different gear sets is quite useful since all situations don't always call for the same gear. In this situation, the "WSmulti" gear set can be used for multi-hit weaponskills like Penta Thrust where accuracy and DEX is moreso needed.

Our next lesson will delve into variables with the gear sets...so long as my ADD doesn't kick in. Otherwise, my next post will be about making tomato omelettes!

Monday, July 27, 2009

Spellcast Lesson 1, The Dressing Room


Okay, I hope you've done your Spellcast homework. And I hope you have at least some understanding of its basics. Why? I'm not going to hold your hand the whole time (and mostly also because your hands smell like canned vegetables and burnt rubber).

So let's begin!

Within a Spellcast XML file, there are two sections that we will be focusing on for this lesson: sets and rules. Sets are where you set up different types of gear sets for different situations. Rules are where you can equip those gear sets based on what you are doing. This may include casting spells/abilities, healing, engaged with an enemy or just idle (not healing or engaged). There's more to Spellcast that make it work, but let's just start with the basics.

Based on your gear sets, the rules section will predicate how you will switch between gear sets based on what you are doing. So before we get to the xml coding, let's get to know the armor you'll be equipping during typical situations.

Idle Gear
What you wanna wear while not resting, casting or engaged to a mob
main:
sub:
range:
ammo:
head:
neck:
lear:
rear:
body:
hands:
lring:
rring:
back:
waist:
legs:
feet:

Now repeat, the same for when your MP healing set, your melee/engaged set and your casting set. After you know what to equip for each situation, you'll be ready to update your your Spellcast XML file.

Okay, now pick a job that you wanna start with. Create a text file and name it as the job you'll be using it for with an .xml file extension. Save this XML file in the same location as the default.xml file within your windower/plugins/spellcast folder. For example, WHM.xml will be for your White Mage. Then between the gear slot tags below, just add the name of each piece of equipment for each gear set:


<?xml version="1.0"?>
<config debug="false"/>
<spellcast>
  <sets>
    <group name="
Insert Full Name of Job|JOB 3 Letter Abbreviation" default="yes">
      <set name="idle">
        <main>
Insert Idle Gear Item</main>
        <sub>
Insert Idle Gear Item</sub>
        <range>
Insert Idle Gear Item</range>
        <ammo>
Insert Idle Gear Item</ammo>
        <head>
Insert Idle Gear Item</head>
        <neck>
Insert Idle Gear Item</neck>
        <lear>
Insert Idle Gear Item</lear>
        <rear>
Insert Idle Gear Item</rear>
        <body>
Insert Idle Gear Item</body>
        <hands>
Insert Idle Gear Item</hands>
        <lring>
Insert Idle Gear Item</lring>
        <rring>
Insert Idle Gear Item</rring>
        <back>
Insert Idle Gear Item</back>
        <waist>
Insert Idle Gear Item</waist>
        <legs>
Insert Idle Gear Item</legs>
        <feet>
Insert Idle Gear Item</feet>
      </set>
      <set name="melee">
        <main>
Insert Melee Gear Item</main>
        <sub>
Insert Melee Gear Item</sub>
        <range>
Insert Melee Gear Item</range>
        <ammo>
Insert Melee Gear Item</ammo>
        <head>
Insert Melee Gear Item</head>
        <neck>
Insert Melee Gear Item</neck>
        <lear>
Insert Melee Gear Item</lear>
        <rear>
Insert Melee Gear Item</rear>
        <body>
Insert Melee Gear Item</body>
        <hands>
Insert Melee Gear Item</hands>
        <lring>
Insert Melee Gear Item</lring>
        <rring>
Insert Melee Gear Item</rring>
        <back>
Insert Melee Gear Item</back>
        <waist>
Insert Melee Gear Item</waist>
        <legs>
Insert Melee Gear Item</legs>
        <feet>
Insert Melee Gear Item</feet>
      </set>
      <set name="healMP">
        <main>
Insert MP Healing Gear</main>
        <sub>
Insert MP Healing Gear</sub>
        <range>
Insert MP Healing Gear</range>
        <ammo>
Insert MP Healing Gear</ammo>
        <head>
Insert MP Healing Gear</head>
        <neck>
Insert MP Healing Gear</neck>
        <lear>
Insert MP Healing Gear</lear>
        <rear>
Insert MP Healing Gear</rear>
        <body>
Insert MP Healing Gear</body>
        <hands>
Insert MP Healing Gear</hands>
        <lring>
Insert MP Healing Gear</lring>
        <rring>
Insert MP Healing Gear</rring>
        <back>
Insert MP Healing Gear</back>
        <waist>
Insert MP Healing Gear</waist>
        <legs>
Insert MP Healing Gear</legs>
        <feet>
Insert MP Healing Gear</feet>
      </set>
      <set name="castgear">
        <main>
Insert Casting Gear</main>
        <sub>
Insert Casting Gear</sub>
        <range>
Insert Casting Gear</range>
        <ammo>
Insert Casting Gear</ammo>
        <head>
Insert Casting Gear</head>
        <neck>
Insert Casting Gear</neck>
        <lear>
Insert Casting Gear</lear>
        <rear>
Insert Casting Gear</rear>
        <body>
Insert Casting Gear</body>
        <hands>
Insert Casting Gear</hands>
        <lring>
Insert Casting Gear</lring>
        <rring>
Insert Casting Gear</rring>
        <back>
Insert Casting Gear</back>
        <waist>
Insert Casting Gear</waist>
        <legs>
Insert Casting Gear</legs>
        <feet>
Insert Casting Gear</feet>
      </set>
    </group>
  </sets>
  <rules>
    <action when="Idle"    type="equip" set="idle"/>
    <action when="Engaged" type="equip" set="melee"/>
    <action when="Resting" type="equip" set="healMP"/>
    <action when="PreCast" type="equip" set="castgear"/>
  </rules>
</spellcast>


Once all this is done. Start up Windower/FFXI. Change to the job you created a Spellcast xml file for. Throw all the gear that you mentioned in the xml file and head outside.

Now let's start with some Spellcast command basics:

Type out each command in your chat log:
/sc load [name of job-specific XML file]
This should load up your Spellcast XML file for your job.

/sc set idle
This should equip your idle gear set.

/sc set melee
This should equip your melee gear set.

/sc set healMP
This should equip your MP healing gear set.

/sc set castgear
This should equip your casting gear set.

Did it all work? I hope so! Not let's try it in action. Try engaging a mob. Try resting for hp/mp. Try casting a spell. Have fun!

Rosetta Stone, Spellcast Edition!


If you're an avid user of Windower, the Spellcast plugin is something that you may have some degree of knowledge of. You've either heard about, but didn't care...or you wanted to use it, but it was beyond your brain's grasp to understand. Perhaps you're even some IT developer that drinks a lot of coffee and also pees a lot...and think that both XML and Spellcast are child's play.

On the other hand, if you're like me, learning how to harness the power of Spellcast has been a formidable task quite similar to Frodo Baggins and that hyped up ring. So before you turn in to the likes of Golum, let me tell you this: it's gonna take some work to understand it. So if your knowledge of programming is somewhere between XML guru or only being able to update your myspace page with your latest boobie pics, you'll have to do some homework first:

1. Put down the bong, I need you focused for this.

2. Immerse yourself in the basics of Spellcast as well as how to install it.

3. Install it. Duh!

4. In some cases, I will be using my Corsair as my example so familiarize yourself with it: http://wiki.windower.net/plugins/spellcast/userxml/cor/leybot_cor. It's my work in progress so there may be some errors in it currently.

Study them hard! In my next post, our first lesson will be setting up gear sets!

Good luck!

Monday, July 13, 2009

Take the Pain out of Campaign!

Ohohohoho! Why do I cast without warning?
I love the smell of Flare II in the morning!

- Shantotto, Apocalypse Now-taru

Love it or hate it, you need to keep campaigning in the Shadowreign era. Whether it's to maintain your shiny Wings of Honor or to get that next promotion, sometimes fighting the good fight gets tedious. From what I've read on how promotions work, it's partly based on how much Allied Notes you accrue during your evaluation period.

So how can you maximize the amount of Allied Notes you get with minimal effort?
  1. Save all your Campaign Ops tags and wait until the next Conquest tally update.
  2. Once JP midnight hits on Sunday (8AM for PST, 11AM for EST), get a Retrace.
  3. Since it's the beginning of the week, you will notice that almost all the Campaign Ops missions are worth 4-5 stars! These soloable missions yield lots of exp and notes! And the higher your rank, the more you get!
  4. Stick to the quests that require minimal time and no fighting. This means stay away from Offensive/Defensive operations, Stock and Awe, Military training, Deep Cover, etc.
  5. Use up all your 7 Campaign Ops tags all the 4-5 star missions as soon as possible!
This really isn't a big secret. It's almost like camping your favorite crafting guild to buy the good stuff. Show up early and do those missions while they're still worth 5 stars!

If you are in the higher ranks, I recommend doing Slaughterhouse III. Here's what I do:
  1. The night before, go to the homepoint of your nation [s] and set HP (usually it's a shorter walk than the mog house). Change to BLM sub or main.
  2. Slap on a pair of Sprinter Shoes and use them for the quickening effect.
  3. Grab the mission and teleport to a beastmen controlled region.
  4. Find the correct ??? on the fortification, plant the bomb and wait till it explodes.
  5. Click the ??? again to get your exp and complete the mission.
  6. Warp and do it all over again.
If conditions are right, you can use up all your tags within 20-30 minutes. And when the mission is worth 5 stars, you can get just over 500 exp and just under 1,500 allied notes per run. That means 7 runs will net you around 3,500 exp and 10,000 Allied Notes! Eek, I hope my math is right.

If you weren't eligible for a promotion after those 7 runs, a couple of campaign battles should do the trick. And if for any reason the beastmen don't control any of the accessible regions to plant bombs at, I go for Steel Resolve II/III. For me, it's the next quickest mission, but it involves some memorization and quickness.

Saturday, July 11, 2009

Safety Dance


We can dance if we want to
We can leave your friends behind
'Cause your friends don't dance
And if they don't dance
Well, they're no friends of mine...

- Safety Dance - Men Without Hats

Let's face it. None of the other races can look as elegant as a dancing Galka. You may think otherwise, but this statement is irrefutable. Nevertheless, we can all keep trying and keep on keeping on. Just dance for the sake of dancing. Forever.

Dance forever. How do you do just that?
  1. Sign up for a Windower ballroom dance class.
  2. In the scripts folder of your Windower directory, create a dance.txt file with the following contents:
echo "=== Start the Dance Marathon! ===";
echo "Use the Control-Escape Key to end this macro.";

plugin_unloadall
//Remove above line if you do NOT want to unload all your plugins.

alias stopDance01 alias Dance01 /;
alias stopDance02 alias Dance02 /;
alias stopDance03 alias Dance03 /;
alias stopDance04 alias Dance04 /;
alias stopDance05 alias Dance05 /;
alias stopDance06 alias Dance06 /;
alias stopDance07 alias Dance07 /;
alias stopDance08 alias Dance08 /;
alias stopDanceMarathon alias DanceMarathon /;

alias stop stopDance01;stopDance02;stopDance03;stopDance04;stopDance05;stopDance06;stopDance07;stopDance08;stopDanceMarathon;

bind ^escape stop; input /echo [Ending Dance Marathon]; exec init.txt;

//Remove the exec init.txt; portion of above line IF you removed 3rd line.

alias Dance01 input /dance4 motion; wait 3;
alias Dance02 input /dance4 motion; wait 3;
alias Dance03 input /dance4 motion; wait 3;
alias Dance04 input /dance4 motion; wait 3;
alias Dance05 input /dance4 motion; wait 3;
alias Dance06 input /dance4 motion; wait 3;
alias Dance07 input /dance4 motion; wait 3;
alias Dance08 input /dance4 motion; wait 3;

//You can change up the above dance emotes here.
//The wait times after each dance emote can also be adjusted.
//Don't be a douchebag and remove the "motion" after each emote!


alias DanceMarathon exec Dance.txt;

Dance01; Dance02; Dance03; Dance04;
Dance05; Dance06; Dance07; Dance08;
Dance01; Dance02; Dance03; Dance04;
Dance05; Dance06; Dance07; Dance08;
Dance01; Dance02; Dance03; Dance04;
Dance05; Dance06; Dance07; Dance08;
Dance01; Dance02; Dance03; Dance04;
Dance05; Dance06; Dance07; Dance08;
Dance01; Dance02; Dance03; Dance04;
Dance05; Dance06; Dance07; Dance08;
Dance01; Dance02; Dance03; Dance04;
Dance05; Dance06; Dance07; Dance08;
Dance01; Dance02; Dance03; Dance04;
Dance05; Dance06; Dance07; Dance08;
Dance01; Dance02; Dance03; Dance04;
Dance05; Dance06; Dance07; Dance08;
Dance01; Dance02; Dance03; Dance04;
Dance05; Dance06; Dance07; Dance08;
Dance01; Dance02; Dance03; Dance04;
Dance05; Dance06; Dance07; Dance08;
Dance01; Dance02; Dance03; Dance04;
Dance05; Dance06; Dance07; Dance08;
Dance01; Dance02; Dance03; Dance04;
Dance05; Dance06; Dance07; Dance08;
Dance01; Dance02; Dance03; Dance04;
Dance05; Dance06; Dance07; Dance08;
Dance01; Dance02; Dance03; Dance04;
Dance05; Dance06; Dance07; Dance08;
Dance01; Dance02; Dance03; Dance04;
Dance05; Dance06; Dance07; Dance08;
Dance01; Dance02; Dance03; Dance04;
Dance05; Dance06; Dance07; Dance08;
Dance01; Dance02; Dance03; Dance04;
Dance05; Dance06; Dance07; Dance08;
Dance01; Dance02; Dance03; Dance04;
Dance05; Dance06; Dance07; Dance08;
Dance01; Dance02; Dance03; Dance04;
Dance05; Dance06; Dance07; Dance08;
Dance01; Dance02; Dance03; Dance04;
Dance05; Dance06; Dance07; Dance08;
Dance01; Dance02; Dance03; Dance04;
Dance05; Dance06; Dance07; Dance08;
Dance01; Dance02; Dance03; Dance04;
Dance05; Dance06; Dance07; Dance08;
Dance01; Dance02; Dance03; Dance04;
Dance05; Dance06; Dance07; Dance08;
Dance01; Dance02; Dance03; Dance04;
Dance05; Dance06; Dance07; Dance08;
Dance01; Dance02; Dance03; Dance04;
Dance05; Dance06; Dance07; Dance08;
Dance01; Dance02; Dance03; Dance04;
Dance05; Dance06; Dance07; Dance08;
Dance01; Dance02; Dance03; Dance04;
Dance05; Dance06; Dance07; Dance08;
DanceMarathon


What this script does:
First, this script unloads all your plugins (so that it won't interfere with them executing commands at same time). Then, it makes you perform 8 dance emotes in an infinite cycle. Upon pressing Ctrl+Esc, the script will stop running and then reload your plugins via your init.txt script. If you are still dancing, just move your character and he/she will stop.

To execute the script, type //exec dance.txt.

Thursday, July 9, 2009

Paranoia


Ever wonder what those Whitegate shouts in Japanese are all about? Are you paranoid that they are talking about you and only you? Well, I'm afraid to break it to you...but they are. Gasp!

What are they saying? Who knows. Are they talking about the pics of yourself that you posted on your blog and how those skinny jeans really emphasize the need for you to lose weight? Are they talking about your superior tanking ability as WAR43/WHM9? Perhaps they're spreading gossip about you being the forgotten child of the Brangelina duo?

There's only one way to find out:
  1. Put on your Windower foil hat.
  2. Get your LogMon detective kit.
  3. Now put on your Babelfish decoder ring.
After you start up FFXI, you can start up LogMon. Now head to Whitegate and hide behind the counter of Cacaroon the Qiqurn. Keep your eyes peeled. Wait for it.

Nekochobichan: 案ずるより産むが易し.

Aha~! Once you see that shady Japanese text come up in your chat log, toggle over to LogMon and copy the text. Now open up your web browser and go to Babelfish. Paste the text and select "Japanese to English" option. Now hit the Translate button!

Aha~! Wait, what?! Okay, maybe they weren't talking about you. And now that you've translated the text, you're even more confused than before.

What Babelfish says: Rather than worrying, you bear, but it is easy.
What it literally means: Giving birth to a baby is easier than worrying about it.
A Japanese proverb: 1. Fear is greater than the danger. 2. An attempt is sometimes easier than expected.

In any case, you can take off that foil hat because you now have the tools to spy on their open yet private shouts. I don't know if you'll be in a better predicament after all this, but any change is good. Am I right?

Tuesday, July 7, 2009

Epeen Macro Mastery

Are you one of those people that have 5 or 6 macros just to do a single weaponskill? Two macros dedicated to changing out your entire equipment sans your weapon(s). Another macro for your uber relic/mythic weaponskill. And then another couple more to change back into your TP/haste/melee setup. That sound about right?


Let's face it. You like to stroke your e-peen with weaponskill damage in the 4 digit range. Anything less is just unacceptable. In real life, you sport those Affliction t-shirts and have a PC rig that costs as much as the down payment you made on that lifted Hummer. When partying a lowbie job, you keep telling fellow party members of that sick damage you do against Kirin and how you pull out 3k sidewinders in merit parties. Yeah, brooooo. You're like awesome.

Okay, douchebags! It's time to listen to your new anthem and get cracking on some scripts! In this example, I'll use the rare job Samurai that no one really plays too much.

Here's what you'll need before stroking your epeen harder without a lot of macros:
  1. Get some Windower lube for your epeen.
  2. Create two (or three) text files and name them in the following format: [job][equip type].txt. For Samurai melee/tp, you can call it SAMmelee.txt. For single hit great katana weaponskills, name the file SAMws_single.txt. For multi hit weapons skills like penta thrust, create a file named SAMws_multi.txt.txt.
  3. For each of the text files, the contents should be in the following format. Substitute in your own uber gear for each setup:
input /equip head "Ed Hardy Hat +1"
input /equip neck "Snoop Dogg 24K Gold Chain"
input /equip ear1 "Earring of Awesome Power"
input /equip ear2 "Earring of Powerful Awesomeness"
input /equip body "Affliction Tshirt +1"
input /equip hands "Abercrombie & Fitch Leather Wristbands"
input /equip ring1 "2009 Laker Championship Ring"
input /equip ring2 "Pimp ring of Pimped Out Pimpness"
input /equip back "Amemet Mantle +4"
input /equip waist "Douchebag Belt of the Bros +1"
input /equip legs "True Religion jeans of Ridiculousness"
input /equip feet "Chuck Taylor Converse +1"


Now that you have your gear text files created and saved in the Scripts folder of your Windower directory, let's make some macros for that elusive Samurai in mind!

Uber Gekko Macro
//exec SAMws_single.txt
/wait 1
/ws "Tachi: Gekko"
/wait 1
//exec SAMmelee.txt


Penta Thrust of Epeenery Macro
//exec SAMws_multi.txt
/wait 1
/ws "Penta Thrust"
/wait 1
//exec SAMmelee.txt


Bam! Two complete gear changes and your weaponskill ALL IN ONE single macro! Wassup brrrrrrooooo!!!

If you don't want to have ridiculous amounts of instantaneous "Equipment changed." in your chat log, download the Silence as well. It will condense all that nonsense into a single line.

Wanna step your game even more? Then check out Spellcast. Like Extenze, it'll lengthen your epeen even more and give it some girth.

Party hard and keep your mouth yappin' about your leetness!

Monday, July 6, 2009

Bulimia is for Cowards!


So you've just finished exp'ing with some LS mates and you still have your second 3-hour Jack-o-lantern active from your Valkurm Dunes party. Unfortunately, it's time get ready for Dynamis or some Nyzul action and they need you as BLM or RDM! Oh noes, you can not eats teh cookiez!

Forget heading to Lower Jeuno to get your food removed. Don't bother buying some antacids from the AH. Only cowards do that! Wanna get rid of that food in your tummy? Bulimia is for cowards. Just go die! Here are some quick ways to do so:

Easy Peasy
  • Change to a level 1 job that you refuse to level. Go out to Rolanberry Fields, Wajaom Woodlands, etc. and say hello to a monster...with your face! Die. Blood warp. Done!
  • Put up your dukes versus a Colibri and keep smacking it around until it disgustingly takes away your food. I wish I had that Snatch Morsel job ability in real life. I would hang out at the ice cream parlor all dang day.
Alternate Methods
  • Change to your NIN/WHM. Cast reraise and use Mijin Gakure on a spider. Done. By the time you unweaken, you'll already be halfway moving over your SAM tp/haste/ws gear. Unfortunately, you won't have your 2HR ability immediately available, but now you can tell your Dynamis shell you can't go as BRD because you used up your 2HR already. Yay!
  • If one of your exp statics suckered you into leveling your WHM all the way to 75, you can cast Reraise III and then go get faceraped by a flock of colibri and spiders.
  • For those of you that like make things complicated, I guess you can also get a retrace back to the Shadowreign era and die in a campaign battle. Don't forget your Allied Tags!
Then again, who the heck still eats food anyways?! After Level Syncing and meriting against Colibri for so damn long, you cheap bastards probably forgot food exists in this game! Shame on you!!!

Sunday, July 5, 2009

Quit Staring At My Boobs!


For all you perverts out there, find a mithra or female hume wearing a Scorpion Harness...aka the Yokochichi armor (In Japanese, yoko is side and chichi is slang for boob). And position yourself to the left or right of her. Zoom in. Oh snap, side boob action! Take pictars!

Okay then, now that all the pervs are preoccupied for the next couple of hours let's talk about about being /check'd.

"Hornytoad examines you." That's the text you see when some curious player wants to check out your goods. No, I'm not talking about your side boob action. Perhaps, you don't want them checking you for any reason. Gimp armor? Underleveled sub job? While AFK in Whitegate, you don't want people to know that the Shellbuster you're holding isn't really a Kraken Club?

Whichever the case, I'm not going to question your reasons. Here's what you'll need to stave off the pervs and voyeurs:
  1. Take a Windower self defense class.
  2. Carry around a spray can of Autoexec mace.
  3. Include the following line in your Autoexec.xml file: <import>Examined.xml</import>
  4. Create an Examined.xml file with the following content:
    <?xml version="1.0" ?>
    <autoexec>

    <!-- Actions upon being examined -->

    <register event="examined_*">input /equip head; wait 1; input /equip head "Eyepatch"</register>

    </autoexec>
The above will make you blink and cause the would-be checker to close your equipment screen. Woohoo!

Suppose there are certain people that shared with you their interest in tentacle hentai porn and adding them to your blacklist wasn't enough. You want to take specific action if these particular people /check you. Here's what you can do. Add the following line(s) above the "examined_*" line of the Examined.xml file:

<register event="examined_Tentacleman">input /slap Tentacleman</register>
<register event="examined_Hentaiwarier">input /tell Hentaiwarier GO F URSELF!</register>


Okay, I think you get the idea of what you can do. Remember female humes and mithra, put on your pants and don't equip the Yokochichi while AFK...unless you mean to do that on purpose, then you're probably the type that has a tramp stamp tattoo on your lower backside with your thong gratuitously showing above your low-rise jeans. Classy! Like me!

Saturday, July 4, 2009

Celestial Cockblocking 2009


This may be a little late, but I just started to do the Celestial Nights 2009 event. There are a couple of guides that do a detailed job on how to participate in the event.

If you're lazy like me and don't wanna read all the descriptions and guides, here's my lazy ass guide for you lazy ass people. So let's get to the poppycockery!

Bottom line
You want free crap for you mog house and a pimp robe.
What you have to do
Be the princess' wingman. Cockblock the prince.

  1. Follow the couple around like a third wheel. Listen to their cheesy banter and throwup in a bucket.
  2. Since the princess has no game, you'll have to /wave at the floozies to distract them. The tramp will face you. Position yourself so that she's not looking at the couple as they walk by.
  3. If the tramp still manages to get the prince's attention, it's time to get serious. /slap the prince until he weeps like a lost dog and moves on.
  4. If all goes well, follow them to the end. Talk to the shameless and gameless princess for your reward. Keep doing it till you get the items you want.
If you're a guy, this may feel unnatural for you. If you're a girl, you may not even need to read this guide since it already comes natural for you.

Once you're done, pat yourself on the back. Congratulations, you are an excellent wingman/cockblocker! Depending on your gender, writhe in shame or bask in glory.

Friday, July 3, 2009

It's Friday, I'm in love

"I don't care if Monday's blue
Tuesday's grey and Wednesday too
Thursday I don't care about you
It's Friday, I'm in love..."

Great song.

For some of you, you never go outside. The only light you get is from the lamp adjacent to your computer monitor. Chances are, you may not even know what day it is in real life. On the other hand, you know the elemental days of the week, the weather in all of Vollbow region and which direction to face while crafting with fire crystals. You can recite the days' order forwards, backwards, with one leg tied behind your neck while being tickled by a ketchup bottle.

As for the rest of us, however miniscule that number may be, it is quite the opposite. Yep. I still don't really know the order. Gag me with your ketchup bottle. That's why I have this nifty trick that reminds me the order without having to toggle to my web browser set to FFXIclopedia.

To perform this magic trick, you'll need:
1. Wave a magician's wand around and install the latest version of Windower.
2. Out of a top hat, pull up the Autoexec plugin by it's ears.
3. Conjure up an XML file called "DaysOfWeek.xml". The contents should be as follows:


<?xml version="1.0" ?>
<autoexec>
<!-- Days of the Week -->
<register event="day_Firesday" >input /clock on; input /echo Tomorrow: Earthsday</register>
<register event="day_Earthsday" >input /clock on; input /echo Tomorrow: Watersday</register>
<register event="day_Watersday" >input /clock on; input /echo Tomorrow: Windsday</register>
<register event="day_Windsday" >input /clock on; input /echo Tomorrow: Iceday</register>
<register event="day_Iceday" >input /clock on; input /echo Tomorrow: Lightningday</register>
<register event="day_Lightningday">input /clock on; input /echo Tomorrow: Lightsday</register>
<register event="day_Lightsday" >input /clock on; input /echo Tomorrow: Darksday</register>
<register event="day_Darksday" >input /clock on; input /echo Tomorrow: Firesday</register>
</autoexec>


4. Include the following line in your AutoExec.xml file:

<import>DaysWeek.xml</import>

If done properly, at the turn of each day, /clock on will activate as well an echo message of what tomorrow will be. How fun is that!

Note: I'm assuming you have knowledge of how to use Windower and how to familiarize yourself with the available plugins. If not, it's time to do your homework.

Ranger G-spot & Unlimited Shot


Oooh. A little to the left. Mmmm. Okay now, move up more. No wait, that's too much. Sweet feathery Jesus, OMG that's it!

Still trying to find the Sweet Spot to maximize your damage with your pew pew? Yes, it varies with gun, bow and crossbow...and maybe even that pebble you like to throw at worms. So you want to find it faster so you can quickly lay that monster...to the ground? Here's what you'll need to do:
  1. Go to the book store and buy Dr. Ruth's copy of "How to satisfy your mate with Windower".
  2. Skip to chapter 4, "Finding the elusive G-spot with your Distance plugin".
  3. Depending on the size of your weapon, you may have to stand closer or farther away. Get a ruler to see how your weapon measures up or just go here.
The distances on FFXIclopedia aren't the same as what you'll see exactly using the distance plugin, but you'll figure it out in the end.

And remember to always practice safety first as well. You don't wanna be sticking your Patriarch Protector's Arrow into something unclean without first slapping on Unlimited Shot. You'll need three macros to get the job done.

Ranged Attack
Use this while shooting for TP. Unequips any ammo and equips TP ammo, then fires it while announcing your TP level. The last line is optional, but is helpful for those that aren't typically engaged while shooting for TP.
/equip ammo
/equip ammo "Demon arrow"
/ra <t>
/echo TP<tp>


Unlimited Shot
Unfortunately, this one isn't entirely stupid-proof. If Unlimited Shot is still on recast, do NOT use weaponskill! If you chose not to WS or the JA is not up, it will switch back to your normal ammo after X seconds. X is equal to whatever you're comfortable with. If JA is ready, then be sure to fire off your Sidewinder macro before X seconds.
/ja "Unlimited Shot" <me>
/equip ammo "Patriarch Protector's Arrow"
/wait X
/equip ammo
/equip ammo "Demon arrow"


Sidewinder
Time for the money shot. Thrust this macro before "X" second from the above macro. It will send your PPA spiralling and then safely return to your regular ammo.
/ws "Sidewinder" <t>
/wait 1
/equip ammo
/equip ammo "Demon arrow"


I hope this helps you as much as it helped me. And remember folks, you don't wanna go out like Willy Lump Lump. Slap it on extra tight!

Thursday, July 2, 2009

Eyepatch, Unofficial Corsair AF


So you wanna lead the life of the pirate, eh? I like to spell it "piret". Why? Let's face it. Pirates didn't practice the finer arts or study Latin at some university. They jumped on a boat looking for booty...and more booty. So it's my theory, they were spelled it phonetically...PIRET.

Okay, so anyways. You decide you want to be a PIRET. Go ahead and first unlock the Corsair! Congratulations! Easy peasy right? =P

Now before you try to face rape some bunnies in the starter zones, you still need to do one damn thing: Get your first piece of unofficial AF. Yes, I'm talking about the Eyepatch

So here's an unofficial guideline for an unofficial quest in obtaining your first unofficial piece of piret AF:
  1. Get things started at the Maze Moblin Mongers in Lower Jeuno.
  2. Enlist the help of some level 20+ friend(s). Get them drunk first.
  3. Change your job to COR level 1.
  4. Jump into the action and order a maze.
  5. Command your "high" level friends to commence the whooping of ass.
  6. Upon completion of maze, go talk to Chatnachoq and collect your prize.
  7. Equip the Eyepatch and do a little /dance4.
After all that is done. NOW, you can properly level Corsair.

Enjoy!

Spectral Jig


"WTFcakes!"

You've probably said that a couple times or so when sneaking and invising around monsters that can facerape you with just their pinky. Whether it be DNC main or /DNC, you've all wished that this job ability would last longer. (At least it's better than a RNG's Camouflage!)

So here's the recipe for some easy and smart Spectral Jig:

Ingredients:
1. One quart of Windower cake batter.
2. Three cups of Cancel plugin frosting.
3. A pinch of Macro know-how

Cook #1 until golden brown. Apply #2 frosting after cooling. Now create the following macro:


//cancel 71
//cancel 69
/ja "Spectral Jig" <me>


The first and second line will cancel your sneak and invis. The third line will obviously instant cast your job ability. No more manually cancelling your sneak and invis and then pounding your macro like pizza dough.

Note: You can not mash this macro. If you do, you will cancel your freshly baked Spectral Jig. Think of it as a delicate souffle. Be smart of where and when you do this. There are some monsters that will aggro the use of Job Abilities or your stupidity.